If you’re planning on buying a
printer soon, you should consider buying an Ethernet or wireless
printer. Prices have come down in recent years and now that most people
have wireless networks, you can setup your network so that you can print
from anywhere in the house or even the world using a service like
Google Cloud Print!
It’s also great for guests because they can connect to your wireless
network and print easily without having to fiddle with cables and CDs,
so you’ll get lots of kudos as a host!
In this article, I’ll talk only about network or Ethernet printers.
Also, this article is for Windows XP users. If you’re using Windows 7 or
Windows 8, the process is far easier and you can read my other post on
adding a printer to Windows 8 here. Now let’s get started. Here’s what you’ll need to do in order to setup the printer on your Windows XP machine:
Step 1: First, connect the printer to your network
by connecting one end of a Cat 5 or 6 cable (which should have come with
your printer) to your router and the other end into the network port of
your printer. Now, turn your printer on and wait for it to become
ready.
 Step 2:
 Next you’ll need to get the
IP address of your printer. The
IP address is what will let your computer know where to find your printer on the network. All
network printers
allow you to print a configuration sheet that will list basic
information about the printer along with the current network
configuration.
For most printers, this involves pressing the
Menu button on the printer, going to the
Information option and choosing
Print Configuration. Sometimes if there is no display, you just press and hold the
Go or
Print button down for about 10 seconds and it’ll print the configuration page. You will be
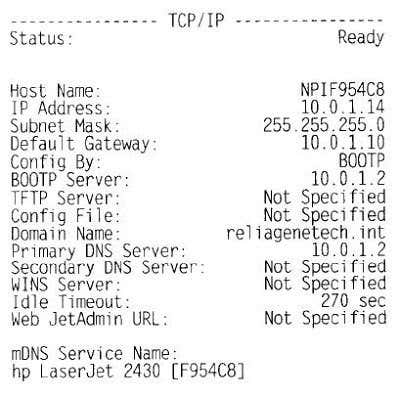
looking for the
TCP/
IP section:

The
IP Address
is what you’ll need for the next steps. You printer should
automatically get an IP address from the DHCP server on your network. At
home, the IP should be coming from the wireless router or residential
gateway if you have one that acts as a cable modem plus router.
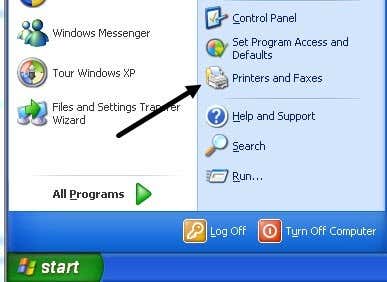
Step 3: The last step is to add the printer to your computer. Click on Start, then
Printers and Faxes.

If you don’t see this in your Start Menu, you can go to Start,
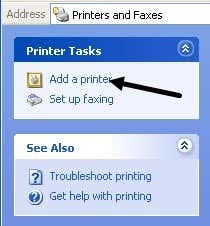
Control Panel and then click on Printers and Faxes there. Click Add
Printer from the task pane on the left.

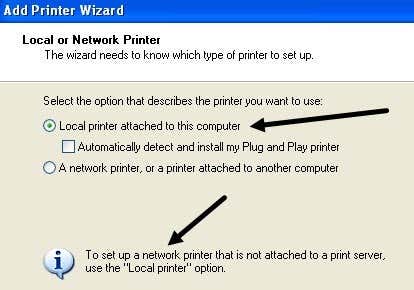
The Add Printer wizard will begin, so click Next to get started. On
the next screen you’ll be asked whether your printer is a local printer
or a network printer. These options are confusing because a network
printer is actually referring either a printer connected to another
computer or a printer on a print server. Our printer is a stand-alone
printer and so you must select
Local printer attached to this computer and make sure that you
uncheck the box for automatically detecting the printer.

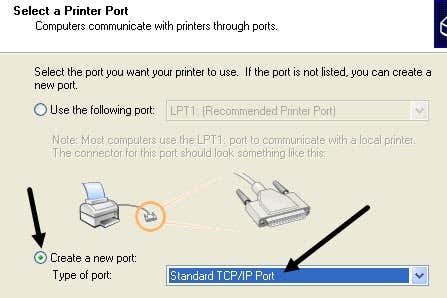
Click Next and you’ll be asked to select the printer port. Since our printer is a network printer with a
IP address, we need to select the
Create a new port option and choose
Standard TCP/IP Port.

Click Next and you’ll get another wizard to add a
TCP/
IP printer port. On the main wizard screen click Next. In the first
text box, Printer Name or
IP Address, enter the
IP address from the printer configuration sheet you printer earlier.

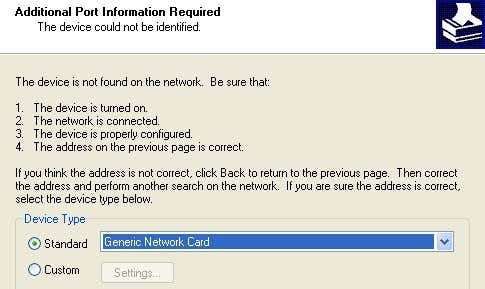
Click Next and depending on the printer you have, you may get one
more dialogs before the end of the wizard. If the network card for the
printer cannot be identified, the wizard will ask you to choose the card
type. You can leave the default of “
Generic Network Card” and click Next.

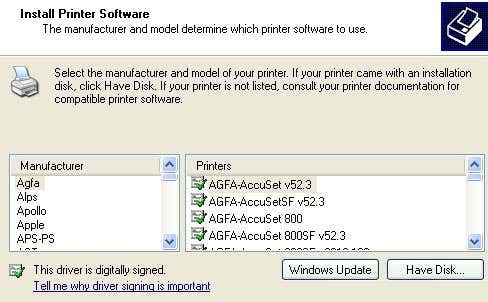
Click Next and click Finish. You will then continue on with the Add
Printer wizard and you’ll need to either choose the printer from the
list of manufacturers or click
Have Disk and insert your printer driver
cd in the computer.

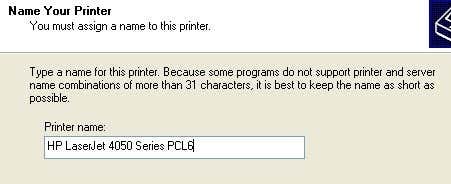
Click Next and enter a name for your printer and click the Yes radio
button if you would like the printer to be your default printer.

Click Next and you’ll be asked whether you want to share the printer
or not. Click No because anyone else who wants to connect will be able
to do so following the same steps. In later versions of Windows XP, the
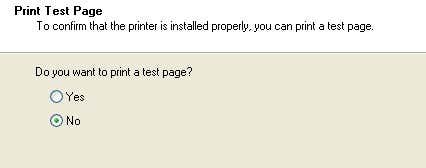
printer sharing dialog has been removed. Click Next and click Yes to
print a test page and make sure that the computer and printer can
communicate!

Click Next and then click Finish! The
new printer will appear in your Printers and Faxes screen and you’re ready to print to your network printer in Windows XP!