HOW TO INSTALL AND EDIT A MOGRT TEMPLATE IN ADOBE PREMIERE PRO
Mogrt is short for Motion
Graphics Template and is a single animation exported from Adobe After
Effects. For easy, seamless editing, open the .mogrt file template in
Premiere Pro via the Essential Graphics Panel.
In
this tutorial, you will learn how to use motion graphics templates in Adobe
Premiere Pro and edit them in just a few clicks. The process is identical on
both Windows and macOS.
If
you prefer to learn through video tutorials, check out tutorial
of "
How to add templates to Premiere Pro
Before
you begin, you’ll need:
·
Adobe Premiere Pro CC 2019/2020
(Installed)
·
A project with at least one sequence
·
Your favorite mogrt file downloaded
from Mixkit
How to Import the motion graphics
1.
Open your project in Premiere Pro
2.
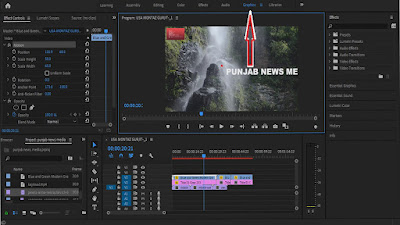
Click Graphics at the top
3.
Find the Essential Graphics panel on
the right side of the screen. If it’s not open already, go to Window >
Essential Graphics
4.
In the right-bottom corner of the
panel click on the little template icon “Install Motion Graphics Template”
5. Browse
to the location of your mogrt file and select it, then click Open
6.
The motion graphics file may now be
found in the Essential Graphics panel under Browse
Tip: If
you have more than one mogrt to install speed up the import by putting the
mogrt on your Motion Graphics Templates system folder. Here’s where to find the
folder:
MAC:
username/Library/Application Support/Adobe/Common/Motion Graphics Templates
Windows
(PC): AppData/Roaming/Common/Motion Graphics Templates
How to Edit a Mogrt
1.
Drag a mogrt from the Essential
Graphics panel to timeline.
2.
Click the Edit tab in the Essential
Graphics panel. Here you may customize styling such as the colors, fonts, font
sizes and even positioning of the call out anchors.


